Live Streaming allows organizations to share content with viewers in real-time, with a number of available features to support interaction during the Live Stream. These features can increase viewer engagement and allow Content Creators to answer questions during the course of a presentation.
Starting Live Streaming
Beginning a Live Stream requires only a few selections in the Software Capture for Apple application, including choosing the desired Media Channel. To learn more about how to install the application, click here.
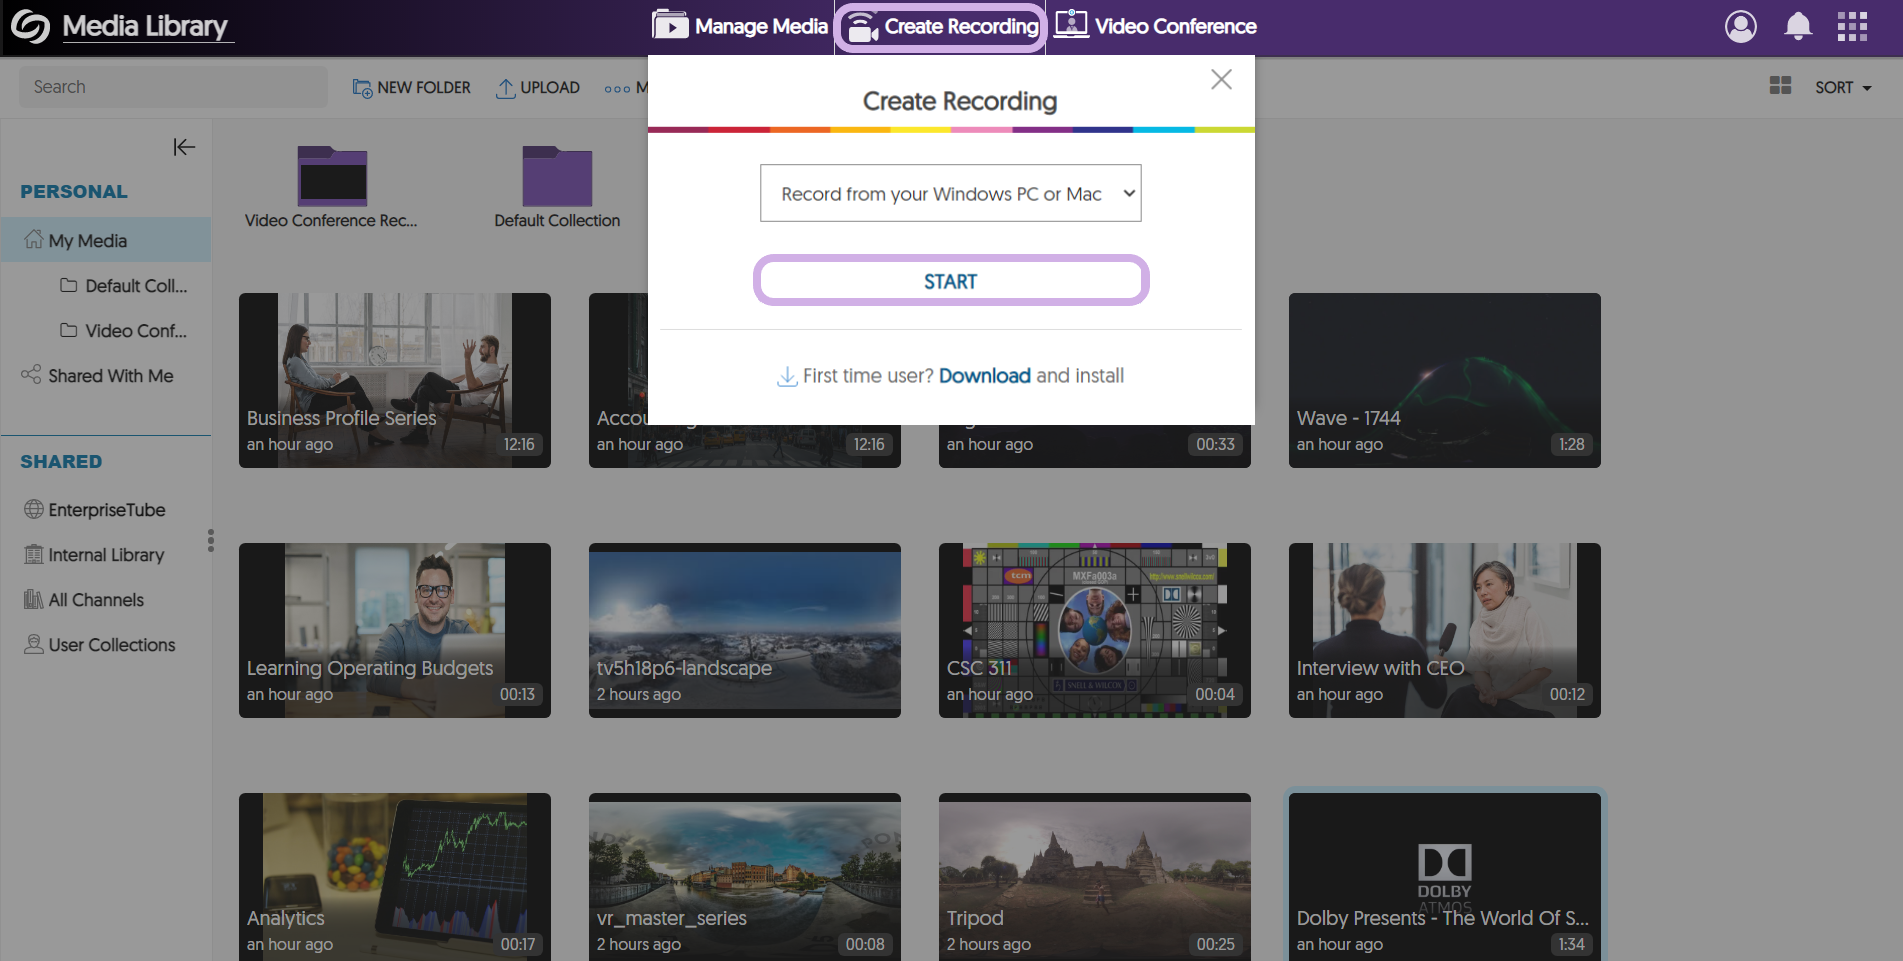
- Click on Create Recording at the top of your screen. Then, select the Start option.
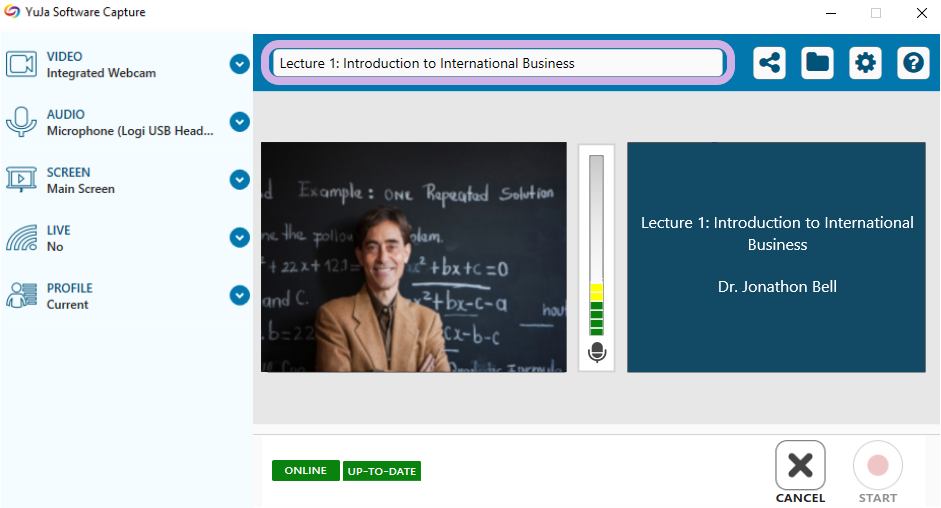
- Enter a Title for your live stream.
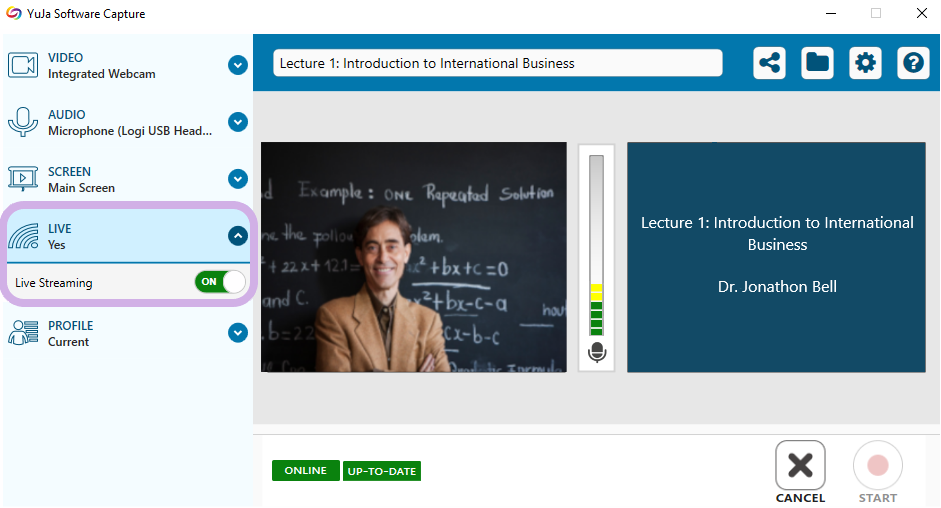
- Select Live from the left-side menu and set Live Streaming to On.
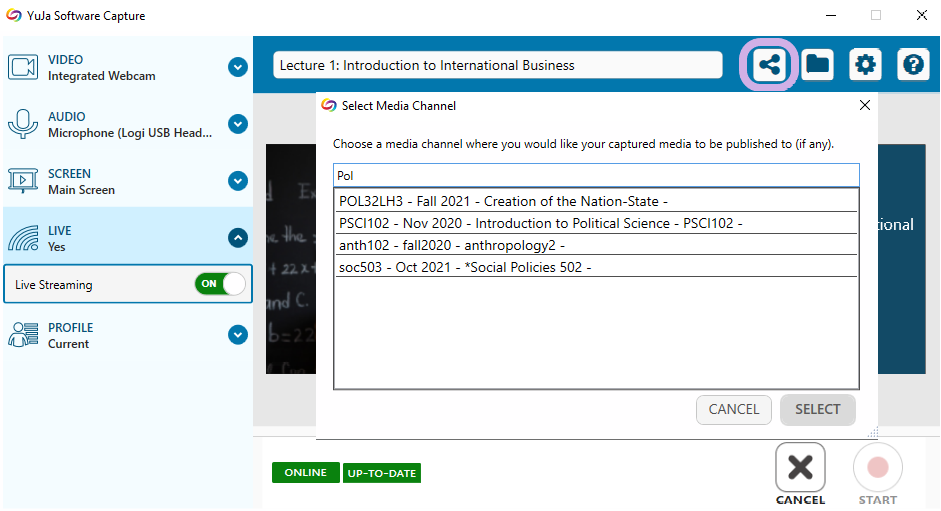
- Click on the Share symbol to select a Media Channel to share your live stream with—you must select a Channel to start live streaming.
Using Live Streaming Features
Live Streaming provides the ability to interact with the audience through Chat, Predefined Responses, and Emojis.
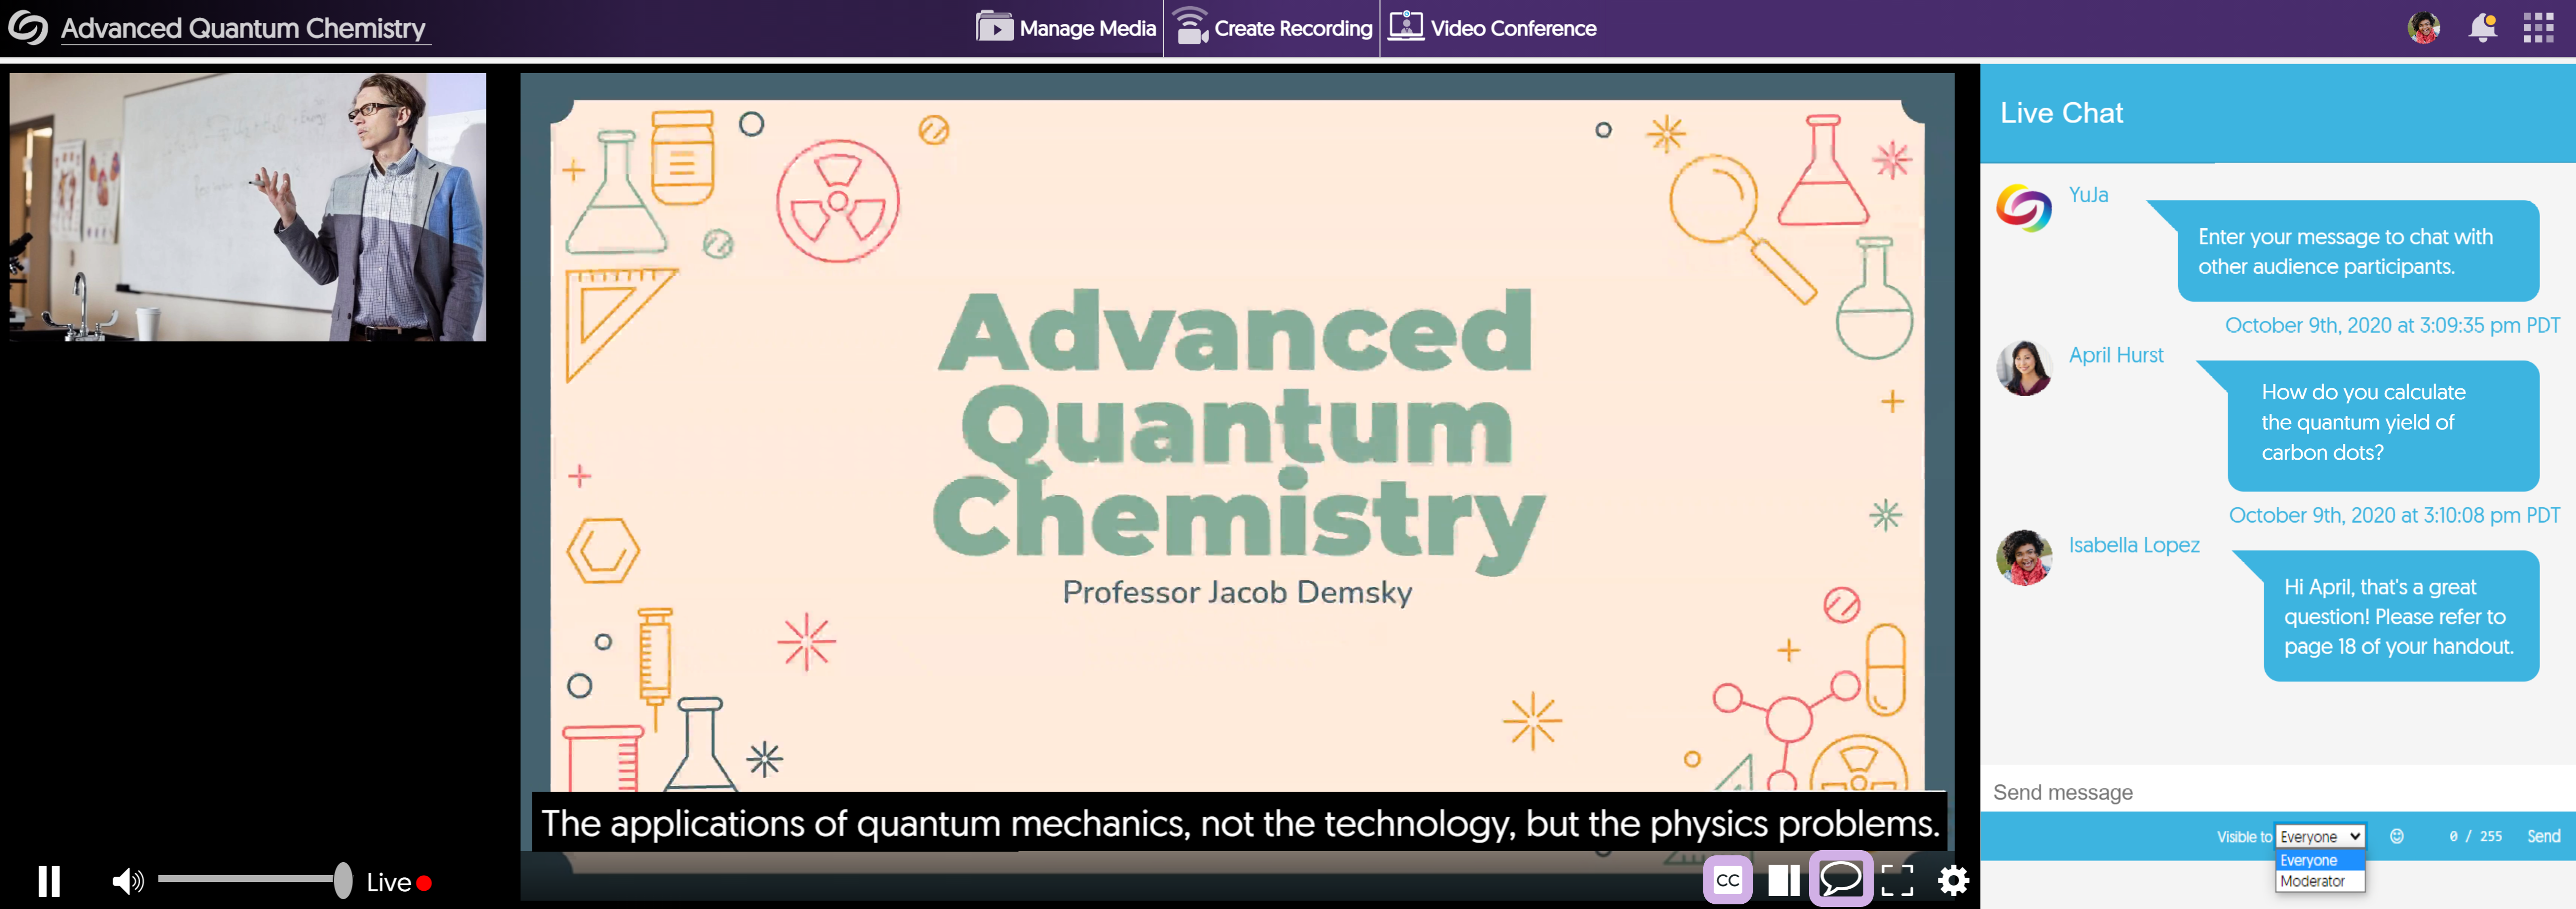
- Open the Live Stream from your notifications menu to access these real-time interactive features.
- Click on the CC icon to view the closed captions of the Live Stream.
- Click on the Chat icon to open a text-based chat with the audience.
- Type messages in the Chat window. Chat is available to all members of the audience to view or exclusively for the Moderator.
- Choose the desired Predefined Response to interact with the audience.
- Click on the Emoji button to open the Emoji options.
Live auto-captions will appear one minute after the live stream begins.